Composition Checklist
This is a listing to cover the non-technical (and thereby subjective) aspects of taking a shot. I have therefore ignored focus, aperture, shutter speed and ISO.
It’s maybe more detailed than you consider necessary in all situations. Some elements might be covered automatically. Hopefully if you take each point into account, you will avoid regretting not paying attention to it when you get home and it’s too late!
After you have found your location and in general terms decided the view you want to capture :-
1. Decide on landscape or portrait orientation.

Sometimes this will be an obvious choice. On other occasions either might be acceptable. If you can't decide, take both.
2. Have a view in your mind what aspect ratio suits the image, 3 x 2, 16 x 9, 1 x 1 etc.


3. Position camera/tripod. Bear in mind that tripod height can be just as important as actual location - especially if you are wanting to incorporate foreground interest.
4. Decide on the lens and focal length needed to capture the image you are after. A couple of points of warning. The wider the lens, the more the image will suffer from distortion. An example of this is converging verticals, where the plane of the sensor is at angles with the plane of the image.
Also, the longer the focal length, the more the image will be foreshortened – near and far objects are brought closer together. This might a desirable effect, but make sure it is a conscious choice.
5. Level the camera. Most modern cameras have aids to levelling. Use these to correct unbalanced horizon but also to decide on a desired up/down tilt. The second should not be ignored as it affects things like perspective and converging verticals (as noted above).
6. Consider the following elements in the image :-
a. Balance. Avoid lots of detail on one side and bland areas on the other.
Consider colour balance too. Become familiar with the colour wheel as an aid to achieving balance.
b. Corners. Look to see that all 4 corners are given attention and don’t allow important features to be cut in half. It’s important to keep in mind your intended aspect ratio crop.
c. Depth. Look at foreground/midground/background. Consider tripod height. Lowering the camera can emphasise foreground interest, but can introduce focus challenges.
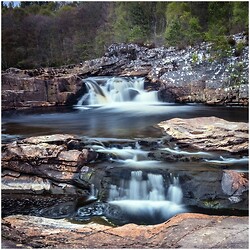
d. Lead-in lines. Consider any element which draws the viewer into the image and adds to the perspective. E.g. walls, roads, rivers, rays of sunlight.
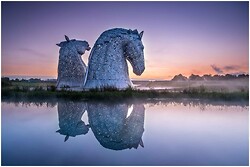
e. Separation. Avoid fore- or mid-ground items breaking up background elements unnecessarily. E.g. rocks in the water breaking the reflection of hill tops.
f. Rules. Look for an opportunity to utilise compositional rules like the rule of thirds. Better to consider them and dismiss them than to ignore them altogether.
g. Frame. Consider any element which might frame the image, e.g. tree branches.
h. Scale. Consider including elements in the frame which convey the sense of scale for the image as a whole. The classic example would be a person, but it could be an animal, a fence, a cottage, a bridge or road.
i. Wait. After a test shot or two, be patient. Make sure that unwanted moving elements are out of the way. E.g. other snappers, walkers, shadows. Ensure other moving elements you want are catered for. E.g. waves, animals, birds, clouds.
Once you have taken what you hope to be the best shot, review it and go through the checklist again to ensure you have covered all the elements listed. As I have said, it’s too late to do this when you get home!